I Love My MAME Cab
 Man do I love my MAME cab. In the culture of emulation, I’m not too keen on the concept. I understand that emulation is necessary and that it has been an essential tool in not only archiving these great works of the past but also in allowing me to play import and fan translated games I otherwise never would have experienced. Still, I think that more often than not emulation gives way to piracy. If I want to go get Super Mario Bros 3 on NES, I’ve got a slew of choices: I can buy the original hardware and game, I can emulate illegally, or I can purchase legal emulated versions (Virtual Console). In most of those scenarios I opt to purchase the tangible hardware/game – but this is not always the case as I have never purchased a Turbografx-16 CD console to play the handful of favorites like Rondo of Blood and instead “settled” for emulated, legal, Virtual Console and PSN versions. On the arcade front the story is a bit different. Not only do I have to pony up large sums of money for the hardware/software – in this case being a working cabinet and PCB board – but I also have to make space, transportation arrangements, power consumption, safety, and in many cases repairs. It’s one thing to buy a PS1 game from Kentucky, have it shipped to you, resurface it if necessary, and then enjoy it. For a good working Salamander cab I may have to pay $500-$1,000 upfront on eBay, drive to Kentucky with a large truck, move the whole thing over 1,000 miles without damaging it and paying for gas/transport, move it into my house, and then most likely degauss a monitor, replace some wires, re-solder some button connections, and if I’m lucky I can play that single game for about 30 minutes before it’s time for my A.D.D. brain to move onto the next new thing.
Enter MAME, Multiple Arcade Machine Emulator, for the PC. MAME is nothing new, the initial C++ build premiered in early 1997 when I was only in high school. It has come a long way since then, but the core of the emulator remains intact and it allows you to play just about every arcade game that has ever come into existence and customize nearly every aspect of each game. This comes with a price: at its core the emulator is command prompt (ie: what you used to call “DOS” if you aren’t familiar with command prompt inputs) that stops many players dead in their tracks. It seems easy at first, just pull open a command prompt, type “mame.exe” along with the name of the game (rom) you want and go. It gets complicated when you try to do things like adjust resolution, fit parameters, add enhancements built into MAME, use arcades with special languages or hard drives (SNK Neo-Geo or Capcome CP2 cabs), utilize controllers, or just plain flip a vertical game like Donkey Kong to working in the horizontal resolution of your monitor. As a result, the MAME frontend has existed nearly as long as the program itself. A frontend is a program that basically controls all of the aspects of MAME, puts in all the command prompt lines and options you want, and makes an easy launcher that usually contains an entire list of available games along with things like bezel art, marquees, screenshots, and even gameplay video. With a copy of MAME (it is free at mame.net), a set of roms (be them a few or a complete 4,000+ set – don’t ask where to get those), and a frontend (here’s where to get those) you can create an all-in-one solution for an arcade on a relatively outdated PC that should only run you $100 today.
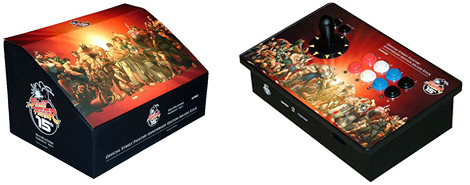
That’s just the beginning for many arcade addicts such as myself. In college it was great, I just turned on this old Windows 98 machine that I set up to autorun the frontend Mamewah, and used the keyboard to play. Eventually you beat DoDonPachi or Final Fight (neither arcade version available by digital means in 2001 when I was in college) enough times that you want the arcade “feel” and upgrade to a gamepad. Using a program like Joy2Key (turns joypad buttons into keyboard presses and it’s free here) you play with the gamepad and pretend your PC has become and arcade console, but eventually that’s not good enough. You do some stupid stuff like buy $200 X-Arcade USB sticks (link) or adapt PS2 Street Fighter 15th Anniversary sticks to your PC, but all have a limited life span and expensive replacement cost that you think twice on whether or not this is a correct solution. Lets face it, arcades from the 80s and 90s were built to be abused and these fragile re-creations of the last decade or two just cannot compete. Eventually you decide to yourself that you are going to get an arcade cabinet.
 That story is different for everyone. Some super classic fans get the Multicade, which is a 60-in-1 collection of the most popular vertical raster games from the past, slam that PCB into any Jamma cabinet (we will get to that later), and now you have simple but addictive games like Ms. Pac-Man, Donkey Kong, and Dig Dug at your fingertips. Others grab those Neo Geo MVS cartridge-based cabs and scour eBay for the perfect combination of two or four classics from that library. Some will buy their favorite game growing up, which is usually safe and inexpensive because by definition our arcade favorites were the ones that saw mass release like Mortal Kombat, Street Fighter II, a Konami licensed brawler, or a shmup. You’ll buy that, play it to death, and then I assure you it will eventually collect dust. Then there are those like me who pick up the cheapest arcade cabinet that meets their needs (in my case it was a Pit Fighter cab with a working 25″ monitor that some guy gave me for free provided I came by and picked it up) and convert it to a MAME cab. In many cases these conversions do not damage the original hardware, require no soldering or electronic knowledge, and only need a scant bit of software knowledge. The following article (with the longest intro in history) discusses the steps to turning a simple arcade cabinet into a MAME cab, the cost involved, and the high level process to making it a reality. As always, you can hit us up at the Contact link if you have additional questions for your setup, but please note that there are lots of online arcade resources that are probably much better than I am. Also if you want to rehab or fix a single game arcade cab or are just curious about that side of it, a great technical resource is John’s Arcade on YouTube.
Selecting Your Cab
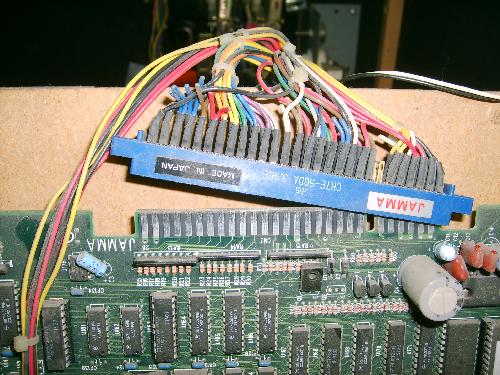
For me this was easy: I wanted something that fully worked with the biggest monitor and cheapest price. As I began shopping I learned that most arcade monitors are between 19″-25″ and a vast majority will have horizontal resolution (like your TV, think Mortal Kombat) vs. vertical (think narrow sideways widescreen monitors like early games Space Invaders, Galaga, and Frogger). There are also two monitor types: raster and vector. Raster monitors look much like the monitors and TVs of today, except that they tend to operate at a 640×480 resolution in 15 khz (which is a much lower frequency than computer monitors, more on that later). Vector monitors are actually beams of light that create razor sharp graphics in either single color or multicolored setups that have more archaic graphics because they are literally drawing the image. Vector monitors are rare because they weren’t in many games and a large quantity have died out and no one is making new ones – games include Red Baron, Tempest, and Asteroids. Vector monitors usually are vertical resolution and should not be used for MAME cabs (not even sure it’s possible). You also will benefit from getting a setup with the proper wiring structure, in this case I recommend the Japan Amusement Machinery Manufactures Association (or JAMMA) setup. JAMMA is the most common wiring for arcade cabinets and it was widely used across the world because you could program your game to use this wiring setup and then swap the PCB (game) in and out of the cabinet at will. It allowed arcade owners to buy like 30 cabinets and then just swap the bezel art, marquee, and PCB around to turn any cab into any game. As a result most of your second generation games and later (1987-2000) will usually have JAMMA wiring, harnesses, and setups. You can easily identify the JAMMA setup by the PCB wiring, or just doing a quick search on Google before buying a specific machine. Please note that JAMMA is either wired for 3-button or 6-button, the later usually only being used by fighting games that already have six buttons, but either can be used by a MAME setup. It can be time consuming, techincal, and an overall headache to convert a 3-button JAMMA to a 6-button because you have to re-wire the whole cab. You have been warned.
In the end I would say that a good two-player, 3-button, decent monitor JAMMA cab can be had for under $200 – sometimes even free like mine – and once you’ve done the wonderful process of moving it (bring a friend and a dolly) and quite possibly disassembling parts of it or your house to get it into a room, you’re good to go. If you are a fighting fan, need a complete working list, or various other factors, a Capcom fighter a la Street Fighter II and its various iterations can be the better option, but cabs like that can vary, get expensive, and have limited quality so use caution when purchasing what is quite possibly the most modded arcade game of all time. Always wanted to find a good well kept Killer Instinct myself but to no avail.
Selecting Your PC
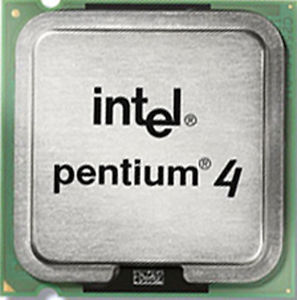 Plain and simple Windows XP is the best PC to run MAME on because it’s compatible with every version, every frontend, and every software solution to making a PC run in a JAMMA harness. You can get by pretty well with Windows 7, but most people I know downgrade to XP (full disclosure: my first MAME PC was an XP but my current is a Win 7). You don’t need too much hardware and an external graphics card, while necessary for this conversion, has absolutely no bearing on the graphics. It’s all in the processor. I usually try to find a 3.0 ghz Pentium 4 or around there because right after that when they went multi-core MAME isn’t optimized for it. RAM can be a biggie because it determines the games you able to play, although 2 GB of RAM are required by Windows 7 and that should be sufficient (and frankly the 512 MB required by Windows XP will still run a vast majority of games). Since price and spec of computers change on a daily basis, this may not be a great reference later, but currently a perfect PC for MAME use would be this one at Micro Center (the Dell Optiplex GX620 Big Case) for $100 (it comes with Windows 7 but XP will be free these days). Even better, this PC supports external PCI-e graphics cards, which most MAME cab creators will need. When purchasing these cheap PCs for your setup, be sure to verify it can do that because there are many former office PCs that have an open PCI-e slot that cannot use them for graphics cards. Again, a quick Google search will help you determine what’s best. Once you get this computer, you’ll want to set it up with all your software and basically make it work the exact same way you want your MAME cab to work before starting the process of converting to your actual cab and adding in the graphics card. You may even want drop a shortcut to your frontend in the “startup” folder for windows so that your PC will boot right into the menu and thus remove the need for keyboard/mouse when finally integrated into your cab.
Selecting Your MAME Version and Frontend
This is completely dependent upon the user. Some people like different versions of MAME than others and at times it may come down to the rom set you have (many MAME rom sets are based on the specific version of MAME they are compatible with due to the name of the roms at the time that version was published). If you mix and match rom sets for one version with a different version of MAME, some roms may be unrecognizable but I do not know how drastic these changes are. You’ll do a lot of reading through message boards in your journey and you may find the version you think is best based on the feedback of others in your search. As for the frontend (links in earlier paragraph), that again comes down to how much customization you want, what operating system you are using, what kind of cab you are using, and then personal preference. The plus side to frontends is they are their own program so feel free to load up the specific MAME and rom set you want and then bounce around between frontends until you find one you like. Again, MAME rom sets are not legal so how you obtain them, how many you obtain, and various other questions involving the games themselves cannot be answered here and will not be answered if you contact the site. Your answer lies in a search.
![]()
Putting it Together
Now that you have a working cab and a working MAME PC, you have to put these guys together. This will require the following: an interface solution (some form of hardware/software that links the PC to the cab for button inputs and video/sound output), a way to send the correct video signal to your cab (this will be a graphics card of some kind), and a few bits of software to connect the pieces.
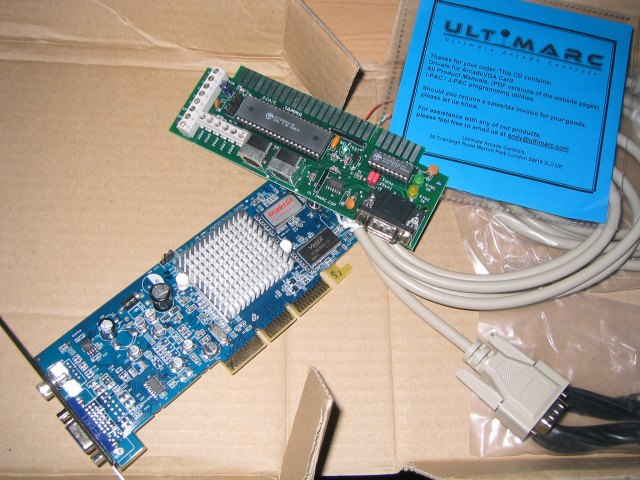 First off, the interface solution. This will almost universally be handled by a J-PAC (I always use UltiMarc), which is a $60 item that plugs into your JAMMA PCB plug and will hook up to your PC’s video card, keyboard/USB port, and also accepts a separate keyboard (if necessary) for you to interface with. In return it will give your PC keyboard inputs for all of your directional pads and buttons. This will be how you can interface with MAME via your cab. Now, while it does
have frequency jumpers for 15/25/31 khz so as not to burn out your arcade monitor with too much power, it does not convert the signal down to those frequencies so you will need a proper graphics card that can do this. J-PAC is ready to go with 3-button setups but will require some re-wiring for any 6-button setups (although you can try plug & play but I doubt it will work). There is a disc that comes with it that contains instructions on various setups, but for the most part I find the J-PAC to be ready to go out of the box (other than the monitor frequency jumpers).
Next is the graphics card. In order to display your PC on an arcade cab you need to get the resolution proper for display (most horizontal monitors are 640×480) and the frequency correct (most monitors I’ve worked with are 15 khz). The easiest way (but not the cheapest way) to do this is to purchase the ArcadeVGA graphics card (also from UltiMarc) for a whopping $90. The plus side you get out of this card is that it’s tailor made for what you want and does pixel perfect recreations on your arcade monitor without software or settings. This is an especially tempting option if you need a J-PAC and purchase at the same time. I have seen them in action and they are nice, but I already had a graphics card that works and a J-PAC so I opted out of this for my current setup. It’s by far the easiest and best option.
Alternatively, you can use a software called Soft15k to force any compatible graphics card to get your PC resolutions and frequencies used by arcade monitors. You’ll be spending some time in the FAQ on this one. If you scour the FAQ you can find compatible graphics cards (I’m in there too), but what I used was a Radeon HD 4350 by Gigabyte I can vouch for and the Arcade VGA is based on the Radeon HD 5450 so those are good starting points. Try to pick cards from that era because they were low profile and required no additional power like today’s cards. Also before you ask (and get no answer), Soft15K does work with Vista (don’t use this OS) and Windows 7. The catch with Soft15K is that once you install it and shut down, the next boot will be in 15 khz and thus won’t display on a monitor, you’ll have to plug it into your J-PAC, turn on your arcade and pray that after it boots you get a viewable screen. Remember to find and adjust the vertical and horizontal placement, size, and v sync to make sure the picture is not rolling, centered, and fully viewable (it’s usually 6-8 nobs with labels found somewhere on or around your monitor). Assuming you’ve gotten it all set up, you should have a working MAME cab like this!
[youtube https://www.youtube.com/watch?v=1Lq14_ThXiY]Cost and Final Rundown
So, how much should you expect to spend? Of course it will vary based on arcade cabinet, hardware, software, options, etc. Here’s a quick breakdown of my setup and you should be able to freely adjust the slight changes to your preferences.
Arcade cabinet: $0.00 (but $150.00 in transport costs for renting a UHaul – be sure to rent the dolly too – and paying for gas and pizza/beer for those that helped me)
Computer: $100.00 (try not to spend more or use a modern rig)
J-PAC: $59.00
Graphics Card: $30.00 (Gigabyte Radeon HD 4350)
Random purchases: $150.00 (hardware, parts, degaussing coil, external speakers, etc)
Total Cost: Approx $500
Total Time Spent on First Build: Approx 10+ hours (spread over a week)
Again, your mileage may vary, but this is a good and (relatively) inexpensive way to play any arcades you would ever want. Granted, based on cost and space this is not the option for everyone but without the cabinet the PC portion and price definitely can be.

Leave a comment